Drive Screw
This program node is used for screwdriving. A screw program must be created in the Spin Dashboard before this node can be used. See the Spin Dashboard section for more information.
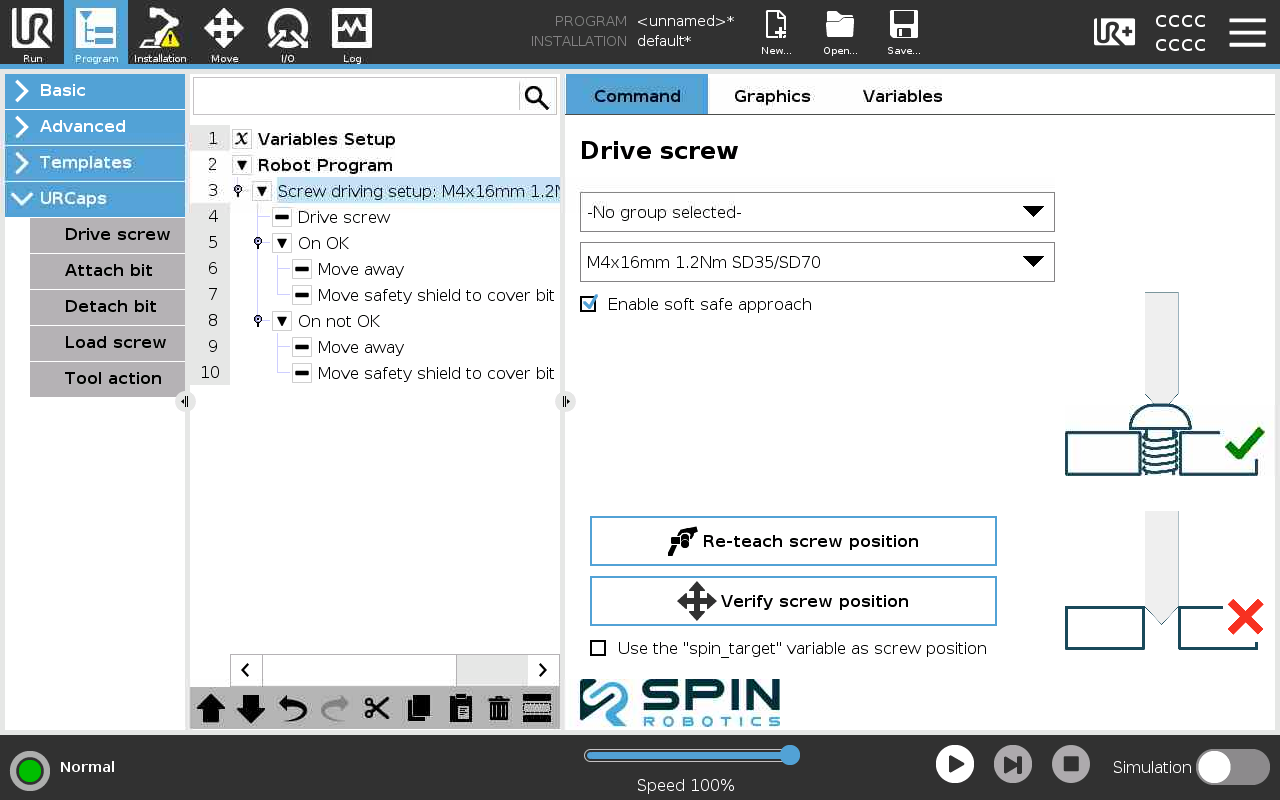
From Program/URCaps select a Drive screw program node.
From the drop down menu in the Screw driving setup sub-node select the screw program to use.
Optionally, filter the screw programs to view by selecting a group.
Note
The Drive screw program node is created with two sub-branches, On OK and On not OK. These sub-nodes are used to control the flow of the program depending on the result of the screwdriving operation. The nodes in the On OK sub-branch are executed if the screwdriving operation is successful. The On not OK-nodes are executed if the screwdriving operation is not successful.
Add the desired program nodes to the On OK and On not OK sub-branches, or leave them as they are.
Teach the screwdriving position by pressing the Teach screw position button. See Teaching a Position.
Optionally, verify the screwdriving position by pressing the Verify screw position button.
Alternatively, the screwdriving position can be set by assigning a pose value to the global spin_target variable before this program node is executed. In this case the you must tick the Use “spin_target” variable as screw position checkbox.